Deploying Webapps with Docker
Great! So you have now looked at docker container run, played with a Docker container, and also got the hang of some terminology. Armed with all this knowledge, you are now ready to get to the real stuff — create Docker Images, and deploy these images as web applications with Docker.
Task 1: Run a static website in a container
Note: Code for this section is in this repo in the static-site directory.
First, we’ll use Docker to run a static website in a container. The website is based on an existing image. We’ll pull a Docker image from Docker Hub, run the container, and see how easy it is to set up a web server.
The image that you are going to use is a single-page website that was already created for this demo and is available on the Docker Hub as dockersamples/static-site.
-
Run the image directly in one go using
docker runas follows.$ docker container run --detach dockersamples/static-siteNote: The current version of this image doesn’t run without the
-dflag. The-dflag enables detached mode, which detaches the running container from the terminal/shell and returns your prompt after the container starts. We are debugging the problem with this image but for now, use-deven for this first example.So, what happens when you run this command?
Since the image doesn’t exist on your Docker host, the Docker daemon first fetches it from the registry and then runs it as a container.
Now that the server is running, do you see the website? What port is it running on? And more importantly, how do you access the container directly from our host machine?
Actually, you probably won’t be able to answer any of these questions yet! ☺ In this case, the client didn’t tell the Docker Engine to publish any of the ports, so you need to re-run the
docker runcommand to add this instruction.
Let’s re-run the command with some new flags to publish ports and pass your name to the container to customize the message displayed. We’ll use the -d option again to run the container in detached mode.
-
Stop the container that you have just launched. In order to do this, we need the container ID.
Since we ran the container in detached mode, we don’t have to launch another terminal to do this. Run
docker container psto view the running containers.$ docker container ps CONTAINER ID IMAGE COMMAND CREATED STATUS PORTS NAMES a7a0e504ca3e dockersamples/static-site "/bin/sh -c 'cd /usr/" 28 seconds ago Up 26 seconds 80/tcp, 443/tcp stupefied_mahavira -
Check out the
CONTAINER IDcolumn. You will need to use thisCONTAINER IDvalue, a long sequence of characters, to identify the container you want to stop, and then to remove it. The example below provides theCONTAINER IDon our system; you should use the value that you see in your terminal.$ docker container stop a7a0e504ca3e $ docker container rm a7a0e504ca3eNote: A cool feature is that you do not need to specify the entire
CONTAINER ID. You can just specify a few starting characters and if it is unique among all the containers that you have launched, the Docker client will intelligently pick it up. -
Launch a container in detached mode as shown below: The command summary the above command:
--detachwill create a container with the process detached from our terminal-publish-allwill publish all the exposed container ports to random ports on the Docker host--envis how you pass environment variables to the container--nameallows you to specify a container nameAUTHORis the environment variable name andYour Nameis the value that you can pass
$ docker container run --name static-site --env AUTHOR="Your Name" --detach --publish-all dockersamples/static-site e61d12292d69556eabe2a44c16cbd54486b2527e2ce4f95438e504afb7b02810 -
Now you can see the ports by running the
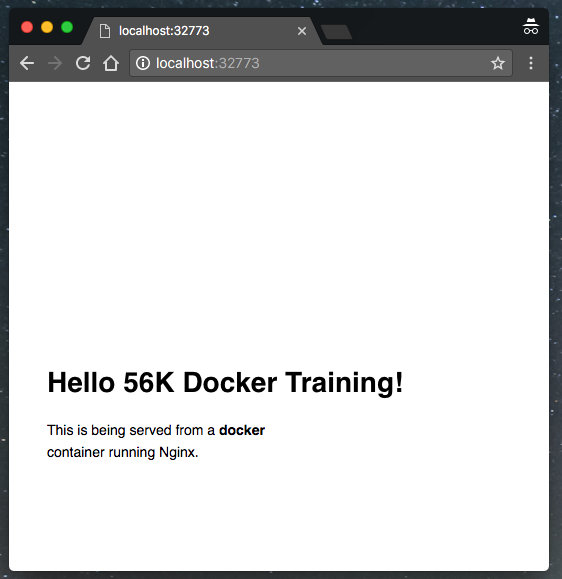
docker portcommand with the name of the newly created containerstatic-site.$ docker port static-site 443/tcp -> 0.0.0.0:32772 80/tcp -> 0.0.0.0:32773Note: If you are running Docker Desktop for Mac, Docker Desktop for Windows, or Docker Desktop on Linux, you can open
http://0.0.0.0:[YOUR_PORT_FOR 80/tcp]. For our example this ishttp://localhost:32773. -
You can also run a second webserver at the same time, this time specifying a custom host port mapping to the container’s webserver. Be sure to change the name
$ docker container run --name static-site-2 --env AUTHOR="Your Name" --detach --publish 8888:80 dockersamples/static-siteOpen your browser to
http://0.0.0.0:32773and open a second tabhttp://0.0.0.0:8888. We can now view both websites running in parallel on your Docker Host.
--publishwill publish instruct the container to map the specified container port to the host port.8888:80= Host:Container PortNow that you’ve seen how to run a webserver inside a Docker container, how do you create your own Docker image? This is the question we’ll explore in the next section.
-
Stop and remove the containers since we won’t be using them anymore.
$ docker container stop static-site $ docker container rm static-site -
Let’s use a shortcut to remove the second site:
$ docker container rm -f static-site-2 static-site-3Note:
rm -fis the not nice way of removing containers. Be warned -
Run
docker container ps -ato make sure the containers are gone.$ docker container ps -a CONTAINER ID IMAGE COMMAND CREATED STATUS PORTS NAMES
Next Step
For the next step in the tutorial, head over to Docker Images and Volumes